Learn Ethereum
Getting Started with Ethereum for Oekaki Connect NFT Collecting
A complete beginner's guide to safely entering the world of NFT collecting with Oekaki Connect!
NFTs are like digital items that you can cryptographically own. Sometimes they are called digital collectibles. The term NFT has been ran through the mud somewhat deservedly (we hate most NFTs too) but also uncharitably (people hate all NFTs universally, but NFT is just a technology like e-mail or HTTP). We like the ideals of NFTs and work to do it the right way!
What You Need to Know First
As a complete beginner, the amount of information you need to learn can feel overwhelming. After you read this article, you'll be prepared to get started as easily as possible!
Understanding the Basics
- Ethereum is a blockchain network that supports smart contracts. NFTs are implemented through smart contracts. Read our article Ethereum Will Win to understand why we use Ethereum.
- NFTs (Non-Fungible Tokens) are unique digital assets stored on the blockchain. You cryptographically own the NFTs in your wallet, which means only you (or someone with your private key) can decide what happens with them.
- Gas fees are transaction costs paid to the Ethereum network when you do transactions. You need ETH in your wallet to pay gas fees / mint fees.
- Wallets store your cryptocurrencies and NFTs securely. A wallet is controlled by a seed phrase / recovery phrase / private key (the private key is derived from the seed phrase / recovery phrase but can also be used directly).
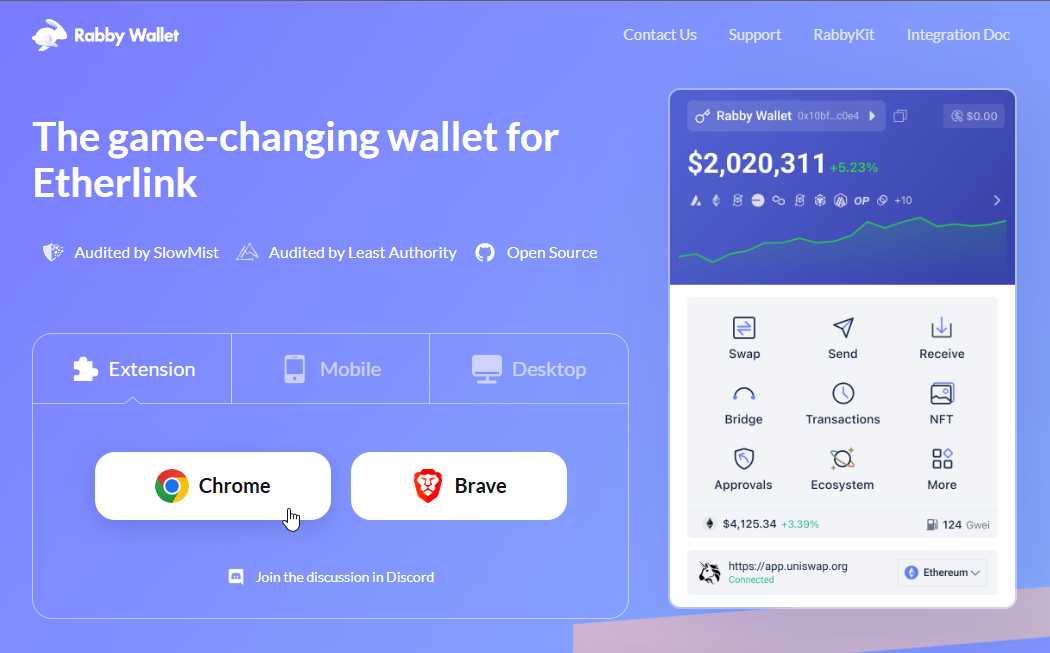
Why Rabby Wallet?
Rabby is a modern, security-focused wallet that provides excellent protection against common scams and offers a user-friendly interface perfect for NFT collecting.
Installing Rabby Wallet
Step 1: Download from Official Sources
- Visit the official Rabby website: rabby.io
- Click "Download" and select your browser (Chrome, Firefox, Edge, or Brave) or installed the mobile app
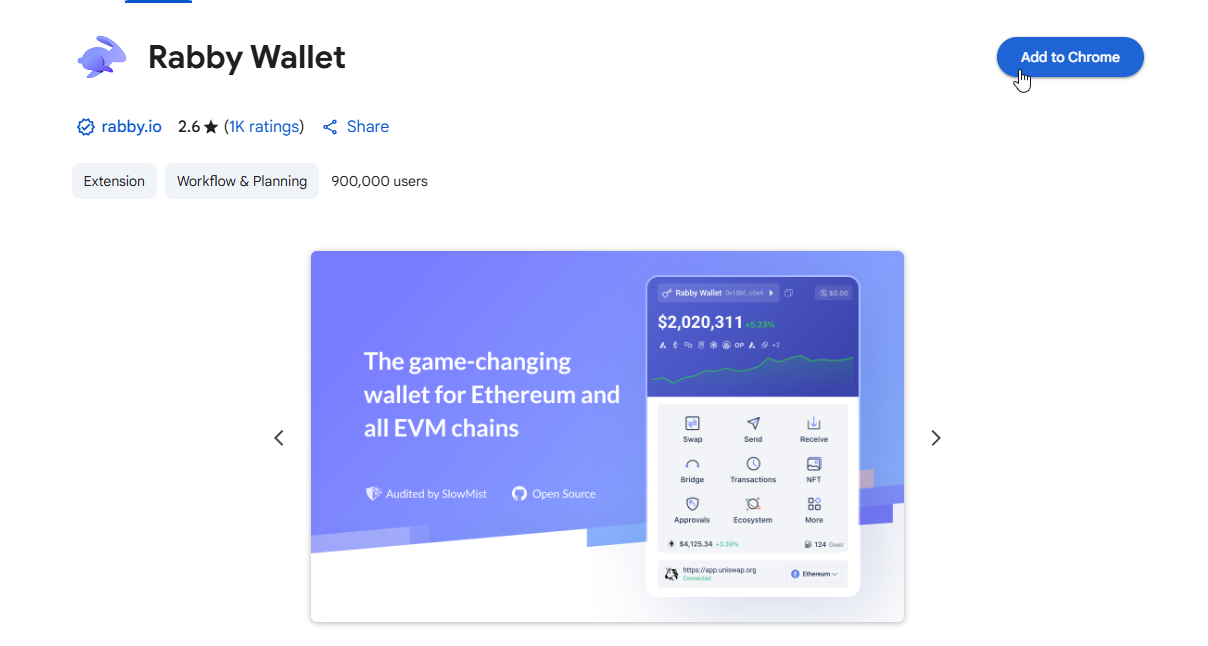
- CRITICAL: Only click through the links on rabby.io to get Rabby! It's possible that scammers can put scam extensions on app stores to impersonate the official versions, so always go to the main domain to get the link, and be careful of typos too. If you install an imposter and use it they can steal from you!
Step 2: Install the Extension
- Click "Add to [Browser Name]"
- Confirm the installation
- Pin the Rabby extension to your browser toolbar for easy access (click the puzzle piece Extensions icon at the top right of Chrome for example and then click the pin icon)
Note: Crypto people can be very tribal and will brigade reviews for a variety of reasons. Check the reviews if you're curious to see what people are complaining about! The best reviewer is YOU so try out Rabby and other wallets if you wish and see which one you like best.
Creating Your First Wallet
Step 1: Initial Setup
- Click the Rabby extension icon if you closed the initial window Rabby opens when you install the extension.
- Select "Create a new wallet"

- Create a strong password (minimum 12 characters, mix of letters, numbers, symbols)
- Write down this password separately - you'll need it every time you open Rabby in a browser session (if you close your browser the next time you open it you'll need to put your password again)
Step 2: Generate Your Wallet
- Rabby will generate a 12-word seed phrase
- DO NOT PROCEED until you understand the next section about securing this phrase
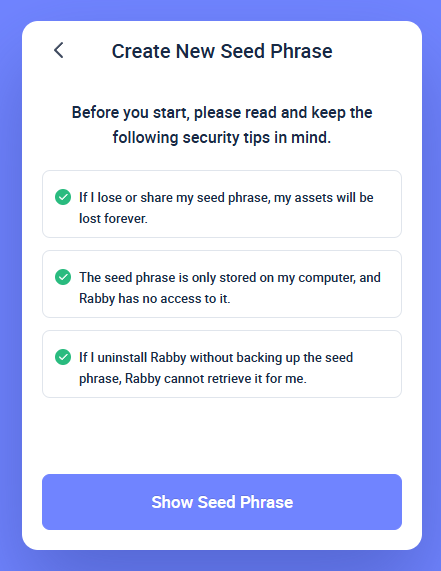
Securing Your Seed Phrase
The Golden Rules - Never Break These
❌ NEVER DO THESE:
- Take a screenshot of your seed phrase
- Save it in a digital file (Notes app, Google Docs, etc.)
- Store it in cloud storage (iCloud, Google Drive, Dropbox)
- Email it to yourself
- Share it with anyone for any reason
- Type it into any website or app (except when restoring your wallet from a trusted wallet extension/app)
If you do any of these things, it's much easier for someone malicious to get your seed phrase (such as from data breaches, it's happened before).
✅ ALWAYS DO THESE:
- Write it down on physical paper with a pen with multiple copies
- Write clearly and double-check each word
- Store the paper in a fireproof safe (waterproof container)
- Make multiple copies stored in different secure locations
- Test your backup by restoring your wallet before funding it, delete the extension, reinstall, test importing
- Make metal backups (you can get kits to etch letters into metal)
Proper Seed Phrase Storage Method
- Get a piece of paper and pen (not pencil)
- Write "Ethereum Wallet Backup - [Date]" at the top
- Carefully copy each word in order
- Double-check every word against the screen
- Store in a secure, private location immediately
Funding Your Wallet
Getting Your Wallet Address
- Open Rabby wallet
- Click the copy icon next to your address (starts with 0x...)
- This is your public address - safe to share for receiving funds
Purchasing Ethereum
Choose a reputable exchange:
Recommended Exchanges for Beginners:
- Coinbase - https://www.coinbase.com/
- Kraken - https://www.kraken.com/
- Gemini - https://www.gemini.com/
Purchase Process:
- Create account on chosen exchange
- Complete identity verification (required by law)
- Add payment method (bank account or debit card)
- Buy ETH (a bit above whatever amount is needed to buy an NFT you have your eye on)
- Transfer ETH to your Rabby wallet address (always test a small amount first)
There are a variety of more stand alone apps you can use to purchase ETH with too such as moonpay.com
Transfer Tips
- Always send a small test amount first ($10-20)
- Wait for confirmation before sending the rest
- Double-check the wallet address before sending
- Transfers typically take 1-3 minutes
Essential Security Practices
Personal Security
- Never tell people IRL you own crypto or NFTs, never dox who are IRL to people online
- Crypto holders are increasingly targeted for theft, fraud, and physical attacks
- Keep your collecting hobby private
- Don't post about purchases on social media
Digital Security
- Use a dedicated browser for crypto activities, get a dedicated Linux laptop ideally
- Enable two-factor authentication on all exchanges
- Keep your browser and Rabby extension updated
- Log out of exchanges when not using them
Transaction Security
- Always verify you're on the correct website (check URL carefully)
- Be suspicious of urgent messages or "limited time" offers, if someone texts or calls you from an exchange it's most likely a scam
- When in doubt, ask in the Oekaki Connect community in general chat from long term users (don't ask in DMs), they will help sanity check you from falling for scams
Pocket Universe
https://www.pocketuniverse.app/
Pocket Universe is a good extension to have installed on your devices to simulate transactions before you sign them in your actual wallet. Even with this extension, you should avoid doing anything crypto on random websites that are not trusted.
- Simulates transactions so you see the result before it happens.
- Will warn you if you visit a site that has been labeled as dangerous.
- This even includes X accounts that are scammers.
Interacting With Random Sites
In general, you should avoid interacting with random sites! You should always be suspicious of random links being sent to you just as you would random links in your e-mail inbox. Getting involved with our community is important because in our public chats people will be able to say if a site is well known or not legitimate. If you want to engage in the wild west, do so on wallets without much to lose on them. Signing bad transactions can mean giving away what's in your wallet for free to scam sites you interact with! This is why transaction simulation such as what Pocket Universe has is very useful and can help you stay safe.
Some Trusted Crypto Sites for Ethereum
- https://etherscan.io/ Etherscan makes it easy to see transaction history in wallets and contracts. You can enter your own wallet address and see all transactions there. You can enter an NFT collection's address there and
- https://www.scatter.art/ The NFT launchpad we trust the most. Contracts there are standardized by Scatter, meaning people cannot deploy custom code. So you can know doing minting there is safe.
- https://swap.cow.fi/ CoW Swap enables you to swap tokens safely while avoiding sandwich attacks (when you do swaps raw it's possible for someone running a node to do another transaction ahead of yours to take some of your expected swap from you!) and can help you get the best swap price by checking a variety of pools first. You might use it simply to swap ETH with WETH conveniently so that you can use the WETH to place collection bids.
- https://www.coinbase.com/ Centralized Exchange (CEX) onloading and offloading funds from on-chain to bank, but NEVER keep funds sitting there. Not your keys, not your coins.
- https://www.kraken.com/ Another CEX that is generally trusted.
- https://www.sushi.com/ Decentralized Exchange (DEX) used to swap ETH into stables such as USDC and USDT. Using an L2 helps lower fee costs.
- https://app.uniswap.org/ Another generally trusted DEX.
- https://jumper.exchange/ Used to bridge from and to Layer 2 chains (L2) such as Abstract, Polygon, Base, Arbitrum, etc.
- https://coinmarketcap.com/ Website with live updates and historical data on major token prices.
- https://metamask.io/ A wallet extension alternative to Rabby which some people use.
- https://www.moonpay.com/buy/eth You can buy Ethereum with this if you don't want to use other exchanges.
- https://app.safe.global/ Allows you to create multisig where multiple wallets must sign to execute transactions. You can store your NFTs in a multisig and then have signers on multiple devices (for example 1 signer on a Linux laptop, 1 on iPad, 1 on macbook) to lower the risk of one of your devices getting compromised and losing everything in one go. If you leave a little bit of ETH in your signer wallets and it mysteriously leaves the wallet you have a good clue that wallet's private key was compromised (and possibly the device it is on too.
While generally safe, it's always possible for trusted sites to become exploited! Another reason why wallet simulation is important.
Your First NFT Purchase
Before You Buy
- Set a budget and stick to it
- Research the artist and collection
- Understand gas fees will be added to the NFT price, the higher the current gas fee in gwei, the more you're paying extra for the transaction, during high activity
- Check gas prices using tools like https://etherscan.io/gastracker
Making the Purchase
- Browse available Oekaki Connect NFTs on Magic Eden or OpenSea, ensure that it's the legitimate collection and not a fake copy
- Click on an NFT you want to purchase that has a Buy Now price
- Click "Buy Now"
- Review the transaction details in Rabby
- Confirm the transaction
- Wait for blockchain confirmation (usually 1-3 minutes)
If you're unsure which OC collection on Ethereum to look at first, we recommend these as fun starting points:
- Oekaki Maker - Magic Eden / OpenSea
- Molady Maker - Magic Eden / OpenSea (100% of the royalties for Molady go to the artist's family)
- Pixelady Maker - Magic Eden / OpenSea
- Pemuto - Magic Eden / OpenSea
Look forward to the upcoming MONOKURO collection launch!
Gas Fee Management
- Gas fees fluctuate based on network activity
- Weekends and late nights (EST) often have lower fees
- Budget an extra 20-50% above the NFT price for gas
- You can adjust gas speed in Rabby (faster = more expensive) but generally you don't need to do this
- Around 10-20 Gwei is decent, the wallet extension you use will tell you how much extra you're paying
Collection Bids
Instead of sweeping the floor (buying the currently lowest price NFTs of a collection) you can setup a collection bid. Sometimes when people sell into your bids you can get surprising tokens which would normally not last long if they were sold at floor price.
Doing collection bids is different based on the marketplace. You'll first need to swap some of your ETH to WETH. Both Magic Eden and OpenSea have UI for this. WETH is Wrapped ETH, it is always 1:1 the same as ETH and can bet swapped back to the same amounts. The reason for using WETH for bids is that you can permit the marketplaces to spend some WETH on your behalf to buy NFTs from your bids.
Trait Bids
If you wish to target specific traits, most marketplaces support this as a feature. Only people with that trait will be able to sell into your bids of tokens they have with those traits for the price you're willing to pay. This is another useful feature if you want to go for specific traits, such as rare traits, by setting a bid higher than the current collection bid, high enough to tantalize sellers.
Minting NFTs
While a collection is minting, you have a chance to be the first to own tokens from that collection! Typically OC uses Scatter.art for minting, but sometimes we use other platforms too. The typical process of minting is:
- Go to the collection page of the collection minting
- Connect your wallet to the site
- Click mint (if it's time to mint) and confirm the transaction (read the details to understand what's going on)
- Become the first owner of original OC art!
OC typically grants whitelists for owners of our current collections, so if you have at least one token from one of our popular collection, you have a good chance of getting first dibs on new OC art!
Why Oekaki Connect?
The context of NFTs was defined by the rugcore era of NFTs. Rugcore collections are created, minted, and traded not for their art, but on the pure speculation assumptions of hype and money. OC has consistently defied these established conventions, and instead done things our way, the way we thought was best for ourselves as artists and our community as collectors of our art in the long term.
OC is an artist collective. We are a big tent in which we publish personal and group projects under a single banner. We create art we genuinely love, we are consumers of art ourselves.
OC is a prolific artist collective. We make art, that's what we do! Here's a list of some of our collections that you can discover (and fall in love with).
Why Collect OC NFTs?
- You want to join a community. You don't actually need to own any OC NFTs to be a part of our community! Yet, actually owning something you love will make you feel more connected.
- You want to support artists you love.
- You want to take part in the minting of our collections. Our mints have been some of the most memorable events in NFTs ever where cherished memories of community and fun have been formed.
Our View On NFTs
We were not happy with NFTs but saw the potential in the technology and how it can benefit genuine artists and art collectors. The biggest NFT mania so far was not at all about the art, people just didn't care about the art. The technology is still very interesting and useful. As a protocol, it is a very useful way to support art you love while also actually owning some art (having cryptographic control of NFTs) from artists you love.
Part of OC's goal is to take over NFTs. To do art on-chain the right way and create a uniquely curated garden which rebukes the reasons why the term NFT has become so toxic.
Ongoing Safety Tips
Red Flags to Watch For
- Unsolicited DMs about "exclusive drops" or "investments"
- Websites asking you to "verify" your wallet
- Promises of guaranteed returns or "risk-free" investments
- Urgent deadlines or pressure tactics
- Requests to share your seed phrase for any reason
Best Practices
- Only visit Oekaki Connect sites, marketplaces, and other trusted sites through your bookmarked link
- Regularly check your wallet for unexpected transactions, ask people in our community if you don't understand something
- Join official Oekaki Connect Discord/ follow the OC X account for legitimate updates
- When in doubt, ask our community for help
- Consider using a hardware wallet or Safe multisig for larger collections
Regular Maintenance
- Keep Rabby updated to the latest version, your browser should generally do this for you
- Monitor gas prices before making transactions
- Back up any new wallets you create diligently
Emergency Procedures
If You Suspect Your Wallet is Compromised
- Immediately transfer all assets to a new wallet
- Create a new wallet with a fresh seed phrase
- Never use the compromised wallet again
If You Lose Your Seed Phrase
- There is no way to recover your wallet without the seed phrase
- This is why secure backup is critical
- Start over with a new wallet if necessary
The Golden Rule: Guard Your Seed Phrase
Your seed phrase (also called a recovery phrase) is the master key to your cryptocurrency wallet. This 12-24 word sequence gives complete access to your funds, and there's one absolute rule that has no exceptions: never share your seed phrase with anyone, ever.
Legitimate companies, exchanges, customer support teams, and wallet providers will never ask for your seed phrase. If someone requests it, regardless of how official they sound or what urgent problem they claim to be solving, it's always a scam.
Common Scam Tactics
Scammers have become increasingly sophisticated in their approaches:
Impersonation scams involve fraudsters posing as customer support representatives from popular platforms. They may contact you via phone, text, email, or social media, claiming there's an urgent issue with your account that requires immediate action.
Phishing websites look identical to legitimate platforms but are designed to steal your credentials. Always double-check URLs and bookmark official sites to avoid accidentally visiting fake versions.
Social engineering tactics create false urgency or exploit trust. Scammers might claim your wallet has been compromised, that you've won a prize, or that immediate action is required to prevent losing your funds.
Why People Fall for These Scams
Even after being warned, many people still become victims because scammers exploit psychological triggers. They create artificial time pressure, pose as authority figures, and target moments when people are confused or seeking help. The technical nature of cryptocurrency can make users doubt themselves and trust supposed "experts" who offer to solve their problems.
If scammers know enough about you (likely due from data leaks), they will use that information against you to curate special attacks against you. Basically, always ignore these attacks.
Final Reminders
- Your seed phrase is like the key to your bank account - guard it carefully and don't talk about it IRL
- Start small while you learn the ropes
- Take time to understand before acting
- When something seems too good to be true, it probably is don't get tricked by scams
- The Oekaki Connect community is here to help answer your questions
Welcome to the world of NFT art collecting!
Take your time, have care and fun, and enjoy being a part of Oekaki Connect!
Ready to go deeper? Check out https://explaineth.com/ for more explanations of how Ethereum works!